Lip Filler Before and After: What Real Results Look Like
Let’s be real — when you’re thinking about lip filler, the first thing you want to see is the results. Not just a glowing review or a brand name, but actual lip filler before and after photos that show what you can expect on real faces. That kind of visual proof helps answer the biggest questions: Will it look natural? Will it suit my face? How much filler is right?
We get it. Deciding to enhance your lips is personal, and seeing real outcomes is the best way to feel confident in your decision. In this guide, we’ll walk through a variety of transformations — from 1 syringe results to day-by-day progressions — so you know exactly what to look for before making the leap.
Understanding Visual Results in Lip Filler Treatments
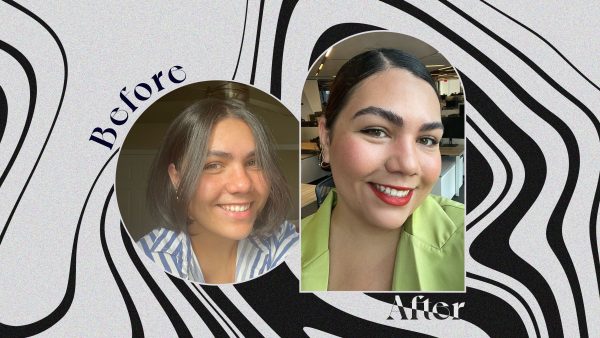
Before and after images are more than just satisfying to scroll through — they’re powerful tools for evaluating treatment success. These pictures show more than fullness; they highlight balance, symmetry, and that all-important natural look that clients crave.
When reviewing lip filler photos, pay close attention to how subtly (or dramatically) the lips have changed in relation to the client’s overall features. A skilled injector works with the face as a whole, not just the lips — and good visual examples help you spot that artistry.
Detailed Case Studies and Examples
Lip Filler 1 Syringe Before and After
If you’re nervous about going “too big,” a single syringe — typically 1cc — is a great place to start. These before and after shots show how even just 1 syringe of filler (like Restylane Kysse or Juvederm Ultra) can make a visible difference without going overboard.
Many patients use this amount to add subtle volume or correct asymmetry, and it’s often enough to make the lips look more defined while staying in harmony with your natural features.
Lip Filler Before and After Thin Lips
Clients with thinner lips are often concerned about looking overdone — but rest assured, that’s not the goal. With a thoughtful approach, even very thin lips can be enhanced to look fuller while still appearing soft and balanced.
Before and after transformations on thin-lipped patients often show a gentle plumping effect — boosting shape without losing that natural taper or border definition. It’s all about enhancing what you already have.
Diverse Lip Filler Pictures
No two lips (or faces) are alike — which is why it’s important to consider a range of lip filler pictures. Some clients want subtle hydration and contouring, while others are going for a plush, voluminous pout.
Reviewing diverse results helps you figure out which aesthetic matches your personal style. Do you want more height in the Cupid’s bow? A pillowy lower lip? Seeing a mix of outcomes can help you communicate your goals clearly in a consultation.
Step-by-Step Transformation and Progression
Day-by-Day Lip Filler Results
Here’s what no one tells you: the best version of your lips doesn’t happen immediately after your appointment. Swelling, small bruises, and even minor shape changes are part of the process — especially in those first few days.
Within 24 hours, most patients feel some tightness or puffiness. By day 3 to 5, things begin to relax as swelling resolves. Your final shape typically settles in around 1–2 weeks, which is when you’ll really see the refined version of your results.
Lip Filler Progression
For some people, especially first-timers, a single session may be step one in a longer journey. Progress photos across multiple appointments show how layering small amounts of filler can produce beautiful, controlled results over time.
This approach allows for more customization and avoids the risk of overfilling — making it ideal for anyone nervous about a dramatic change.
How to Interpret Before and After Photos
Not all before and after images are created equal — and sharp eyes make better decisions. Here’s how to get the most out of what you’re seeing:
- Compare photos taken from the same angle, with consistent lighting and minimal makeup
- Look for improved symmetry without distortion of natural lip shape
- Pay attention to how the lips fit with the rest of the face; bigger isn’t always better
- Be mindful of swelling in early photos, and favor results taken 1–2 weeks post-treatment for accuracy
These details will give you a clearer picture of what’s real, what’s healing, and what to expect from different injectors.
Conclusion and Next Steps
Visual results — from before and after transformations to day-by-day progress — are your best guide for what lip filler can achieve. Whether you’re enhancing thin lips, testing out a single syringe, or visualizing long-term shape goals, these images help turn curiosity into confidence.
The key? Choosing a trustworthy, skilled provider who really understands your face and your vision.
Ready to enhance your look with expert care? Book your free consultation today and take the first step toward feeling more confident.
Ready to feel your best? Book your free consultation today and let’s glow together.


